Asset Permissions
Decide who on your team can do what in the Asset module — from running the Assign workflow to placing a compliance hold. This guide explains how permissions are organized, how to set them up, and how to switch on enforcement when you are ready.
What asset permissions are
Every action in the Asset module is described as a capability – a single thing a person can do, such as running the Assign workflow or applying a compliance hold. Asset permissions are how you grant or withhold those capabilities across your team.
Permissions start out advisory. Until you turn on enforcement (covered further down this page), changing a capability setting does not block anyone – it simply records the access you intend people to have. This lets you set everything up carefully and review it before it affects anyone's day-to-day work.
How permission groups work
The Asset Permissions screen is organized into permission groups. Each group is a set of people, and each group has its own capability settings.
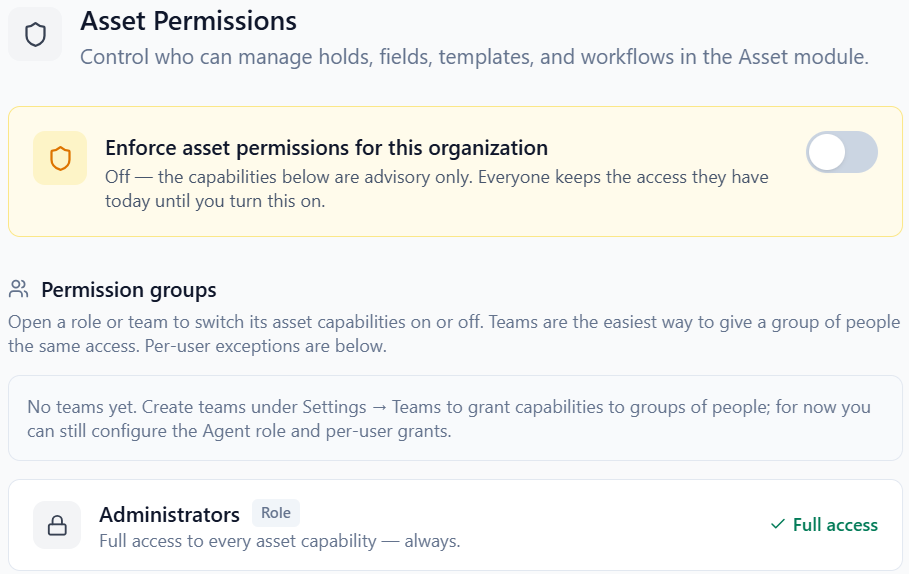
- Administrators – always have full access to everything in the Asset module. This group is shown locked and cannot be changed.
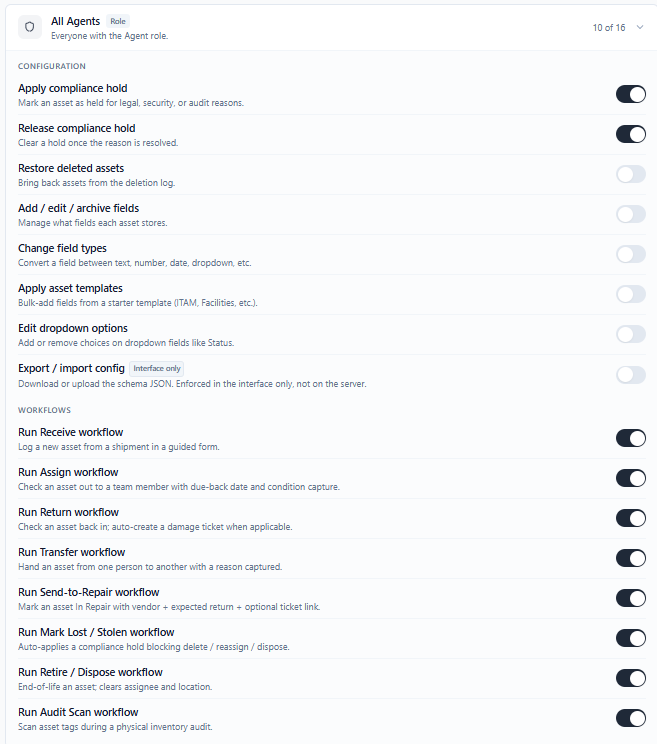
- All Agents – the starting point for every Agent in your organization. Capabilities you switch on here apply to all Agents who are not covered by a more specific group.
- One group per team – if your organization uses teams, each team appears as its own group, so you can give one team more (or less) access than Agents in general.
Setting up permissions
To review or change a group's capabilities:
- 1 Go to Settings > Asset Permissions.
- 2 Click a permission group to expand it. You will see the full list of capabilities, each with an on/off toggle.
- 3 Switch any capability on or off. Changes save as you make them – there is no separate Save button.
- 4 Collapse the group when you are done, and move on to the next one.
A team group's settings take priority over the All Agents group. If someone is on a team that has its own group, FyneDesk uses that team's settings for them. The All Agents settings cover everyone who is not on a team with its own group.
Per-user exceptions
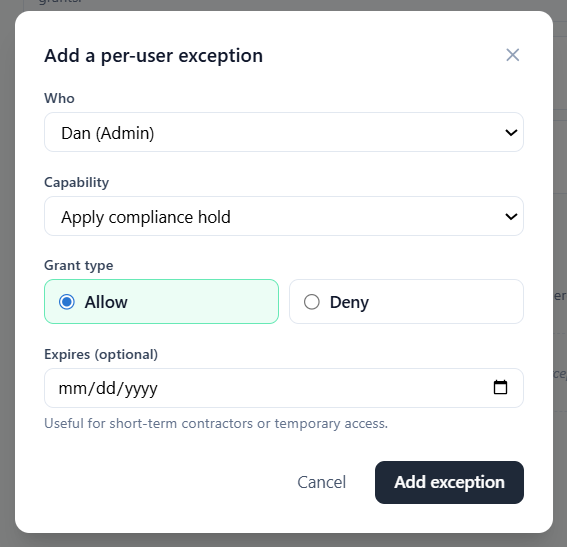
Below the permission groups is a Per-user exceptions section. Use it when one specific person needs different access from their group – for example, a contractor who needs temporary access, or a single team member who should not have a capability the rest of their team has.
- 1 In the Per-user exceptions section, choose the person.
- 2 Pick the capability you want to set for them.
- 3 Choose Allow or Deny.
- 4 Optionally set an expiry date. This is handy for temporary access – after that date, the exception stops applying on its own.
A per-user exception always overrides the person's group settings. A Deny exception blocks the capability even if their group allows it. An Allow exception grants it even if their group does not.
Turning on enforcement
At the top of the Asset Permissions screen is a single master switch: "Enforce asset permissions for this organization." It controls whether your capability settings actually take effect.
- Off (the default) – your capability settings are advisory. Everyone keeps the access they have today and nothing is blocked. This is the safe state for setting things up.
- On – your capability settings are enforced. Anyone without a capability is blocked from that action. Administrators always keep full access, no matter what.
An admin can flip this switch on or off at any time, and the change takes effect immediately. Because of that, it is worth reviewing every permission group before you turn enforcement on, so nobody is unexpectedly blocked from something they need.


Asset capabilities reference
These are the capabilities you will find on the Asset Permissions screen. Each one can be switched on or off per group, or overridden for an individual person.
| Capability | What it controls |
|---|---|
| Apply compliance hold | Place an asset on a legal, security, or audit hold. |
| Release compliance hold | Take an asset off a hold once the reason is resolved. |
| Restore deleted assets | Bring a deleted asset back. |
| Add / edit / archive fields | Manage the fields that assets record. |
| Change field types | Change what kind of value a field stores. |
| Apply asset templates | Add a ready-made set of fields from a template. |
| Edit dropdown options | Change the choices available in a dropdown field, such as Status. |
| Export / import config | Download or upload your field setup. This one is an interface convenience. |
| Run a workflow | Run one of the guided asset workflows. See the note below. |
The Run a workflow capabilities cover eight guided workflows: Receive, Assign, Return, Transfer, Send-to-Repair, Mark Lost/Stolen, Retire/Dispose, and Audit Scan. Today, the Assign and Return workflows are ready to use – see Asset Workflows. The others appear in the permissions list so you can set access ahead of time, but the workflows themselves are still being built.
Frequently asked questions
Do I need to turn on enforcement?
No. Many teams leave enforcement off while they set things up, and some leave it off long-term. With it off, the Asset module behaves exactly as it did before – your capability settings are simply recorded for later. Turn enforcement on when you want those settings to actually block actions.
What happens to Administrators when enforcement is on?
Administrators always keep full access to the Asset module, whether enforcement is on or off. Their access cannot be reduced, which is why the Administrators group is shown locked.
Someone cannot do something they used to be able to do
If enforcement is on, open Asset Permissions and check the person's permission group for that capability. Then check the Per-user exceptions section for a Deny that applies to them – a per-user Deny overrides their group settings.
A per-user exception is not working
Check that it is set to the right person and capability, that Allow or Deny is what you intended, and that any expiry date has not already passed. Also remember that Administrators always have full access, so an exception will not change anything for an admin.