Ticket Management
Create, assign, update, and resolve support tickets. Understand how statuses, priorities, and ticket types work together to keep your queue organized.
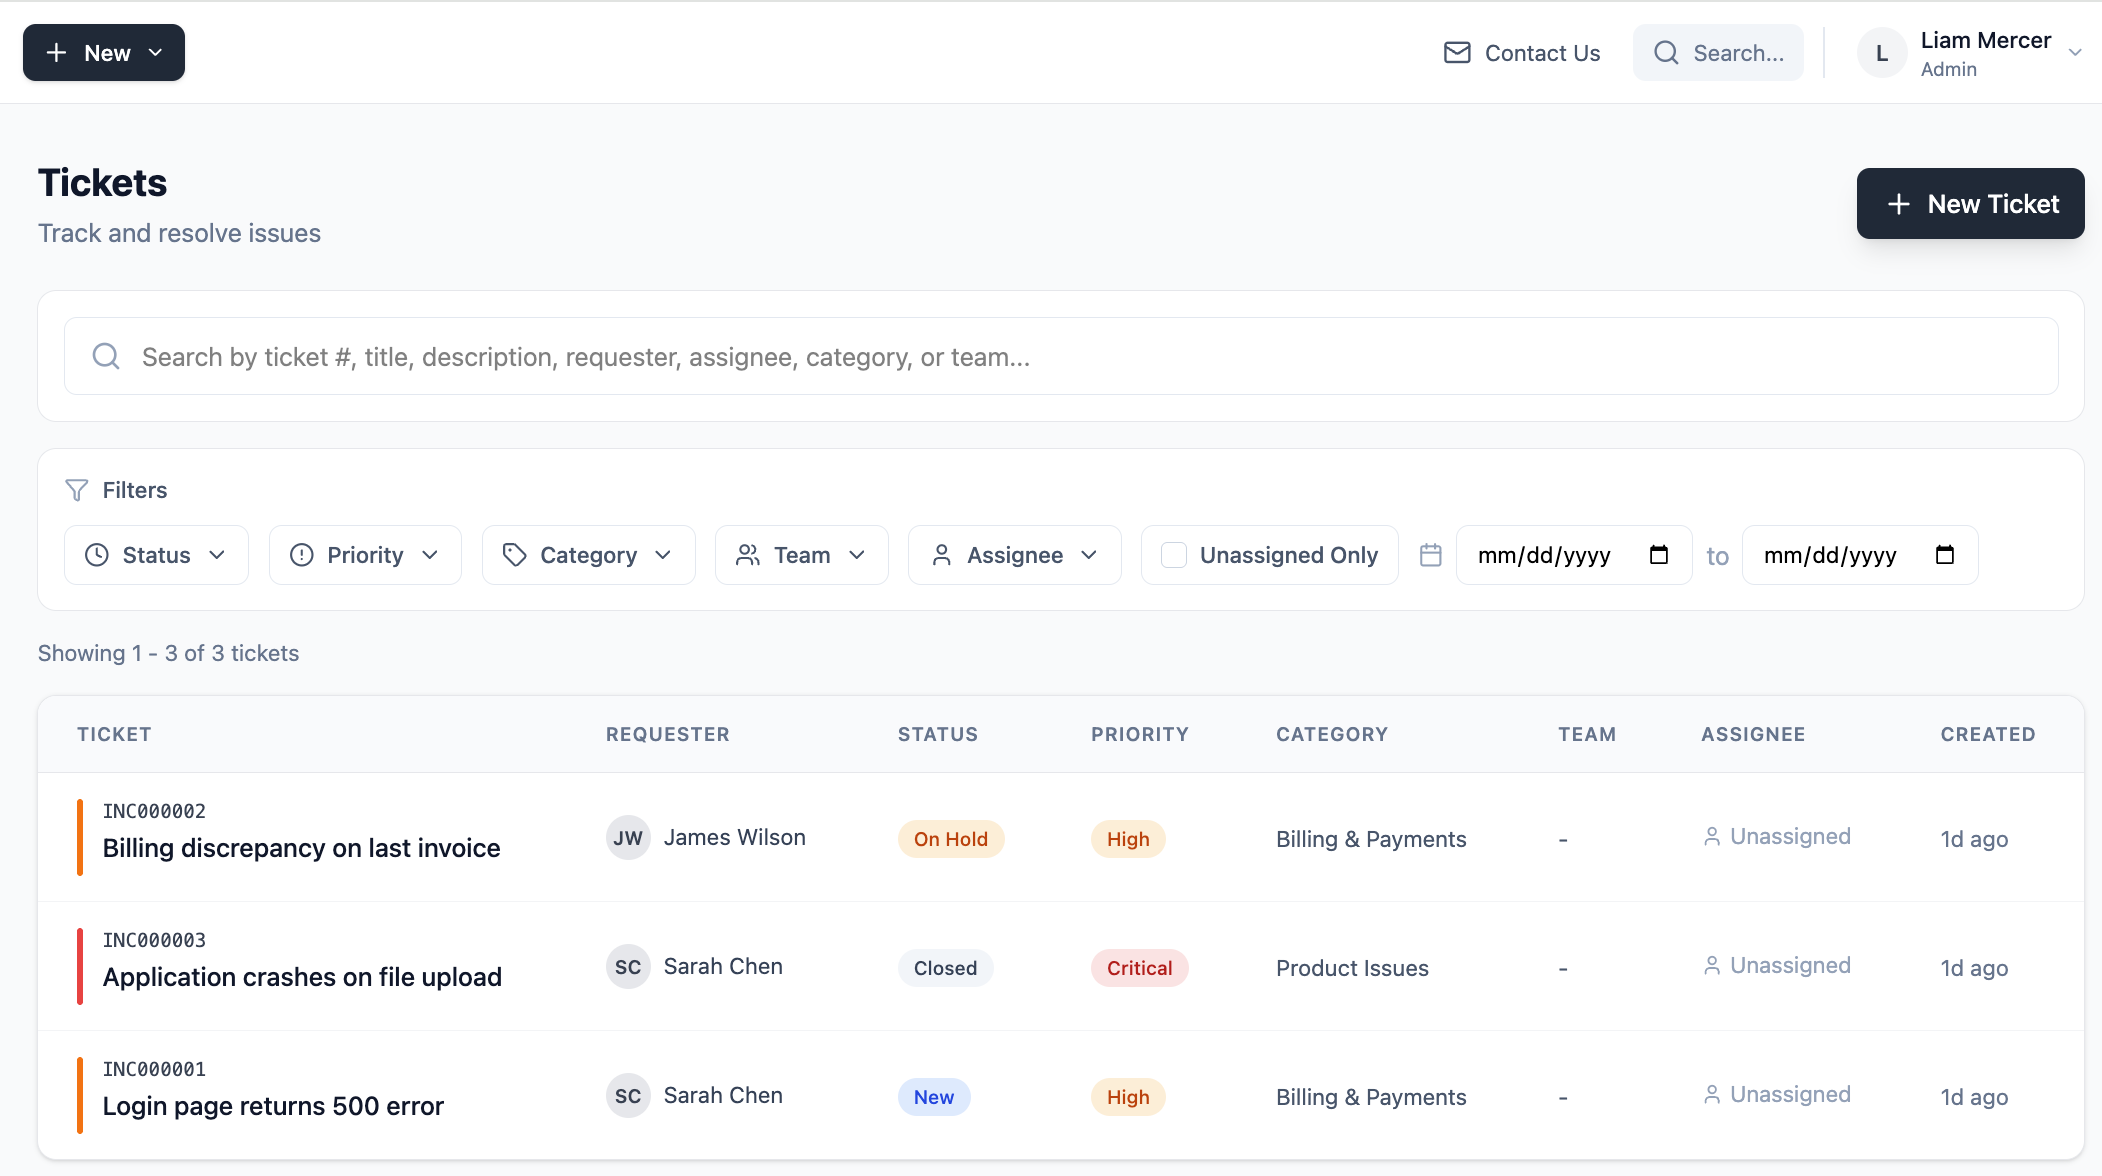
The ticket list
The Tickets page is your main queue. It shows all open tickets in your organization, with filters for status, priority, type, assignee, and more. You can sort by any column and use the search bar to find specific tickets.
Ticket types
Every ticket has a type that describes the kind of work it represents:
Ticket statuses
Status tracks where a ticket is in its lifecycle. A ticket moves through these statuses as your team works on it:
Ticket priorities
Priority reflects how urgently a ticket needs to be addressed:
- Critical — Service is completely down or a major customer is severely impacted. Needs immediate attention.
- High — Significant impact, needs to be addressed soon.
- Medium — Standard priority. Normal workflow.
- Low — Minor issue or informational. Can be addressed when there is capacity.
Creating a ticket
Click New Ticket from the Tickets page or use the button in the sidebar. Fill in the title, type, priority, and a description. You can optionally assign it to an agent, link it to a contact, and add a category.
The ticket detail view
Click any ticket to open the detail view. This is where your team does most of their work — updating status, adding comments, reassigning, and tracking the full history of the ticket.
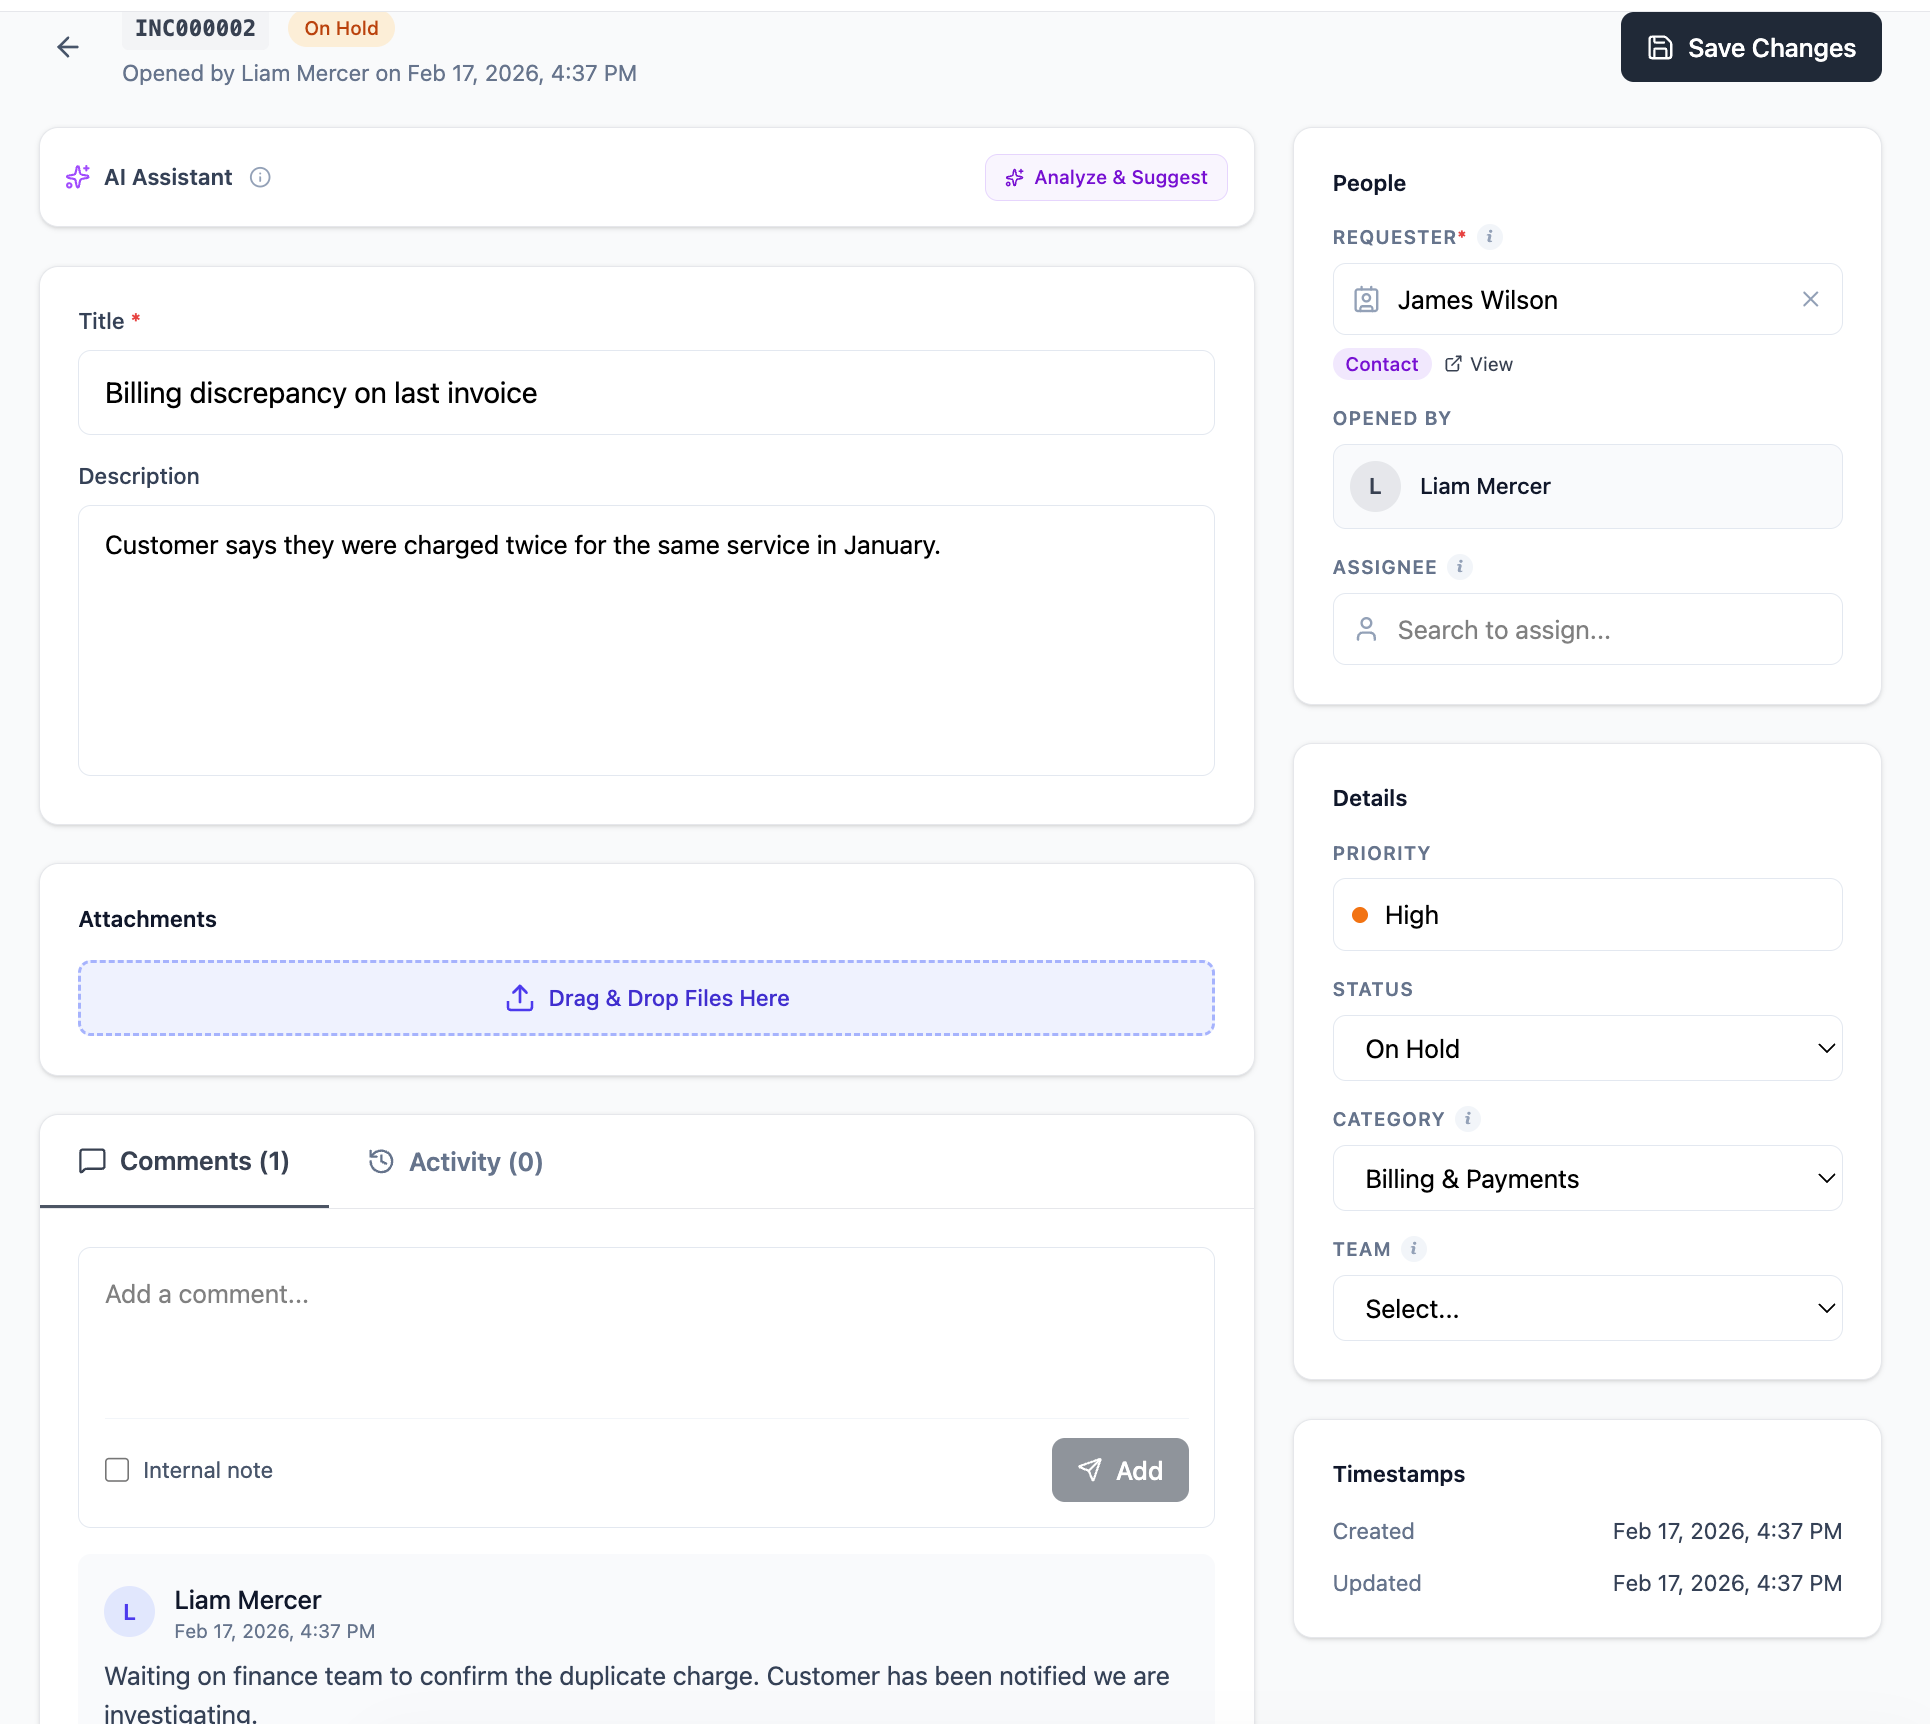
The detail view includes:
- Ticket fields on the right — status, priority, type, assignee, requester, category, and dates
- Description — the original ticket content
- Comments — threaded conversation between agents (and customers for portal/email tickets)
- Activity log — a full audit trail of every change made to the ticket
- Attachments — files uploaded to the ticket
Assigning tickets
Open a ticket and use the Assigned To field on the right side to assign it to any agent or admin in your organization. You can also assign to a team. The assigned agent will receive a notification (if they have notifications enabled in their profile).
Adding comments
Use the comment box at the bottom of the ticket detail to add updates, notes, or responses. Comments are visible to all agents in your organization. For tickets created via email or portal, there is a distinction between internal notes and customer-facing replies (details coming in a future update).
Closing and resolving tickets
When work is done, change the status to Resolved to indicate the issue is fixed. Move to Closed when everything is confirmed complete and no further action is needed. Tickets are never deleted — closed tickets are preserved in your history for reporting and reference.
Filtering your queue
Use the filters at the top of the Tickets page to narrow down your view. You can filter by status, priority, ticket type, assignee, and category. Combine filters to create focused views — for example, all Critical tickets assigned to you that are In Progress.
Frequently asked questions
Can I delete a ticket?
No. Tickets are never deleted in FyneDesk. This is by design — your ticket history is a valuable record of all customer interactions. Close a ticket to mark it as complete.
Can I reassign a ticket to someone else?
Yes. Open the ticket and change the Assigned To field. Any agent or admin can be assigned to any ticket.
What is the difference between Resolved and Closed?
Resolved means the work is done from your team's perspective. Closed means it's fully finalized — typically after confirming with the customer or after a waiting period. In practice, many teams skip directly to Closed when they are confident the issue is fully handled.
Can End Users see all tickets?
No. End Users can only see tickets they are the requester on. Agents and Admins can see all tickets in the organization.