Email to Ticket
Get a dedicated support email address. Every email your customers send to it automatically becomes a ticket in FyneDesk — no manual work required.
How it works
FyneDesk gives your organization a dedicated email address in the format support-yourname@fynedesk.io. When a customer sends an email to that address, FyneDesk reads it and creates a new ticket automatically. The email subject becomes the ticket title and the body becomes the ticket description.
Your team then handles the ticket in FyneDesk as normal — no need to monitor a shared inbox.
Setting up your support email
You need to be an Admin to configure this. Go to Settings → Support Channels in your FyneDesk app.
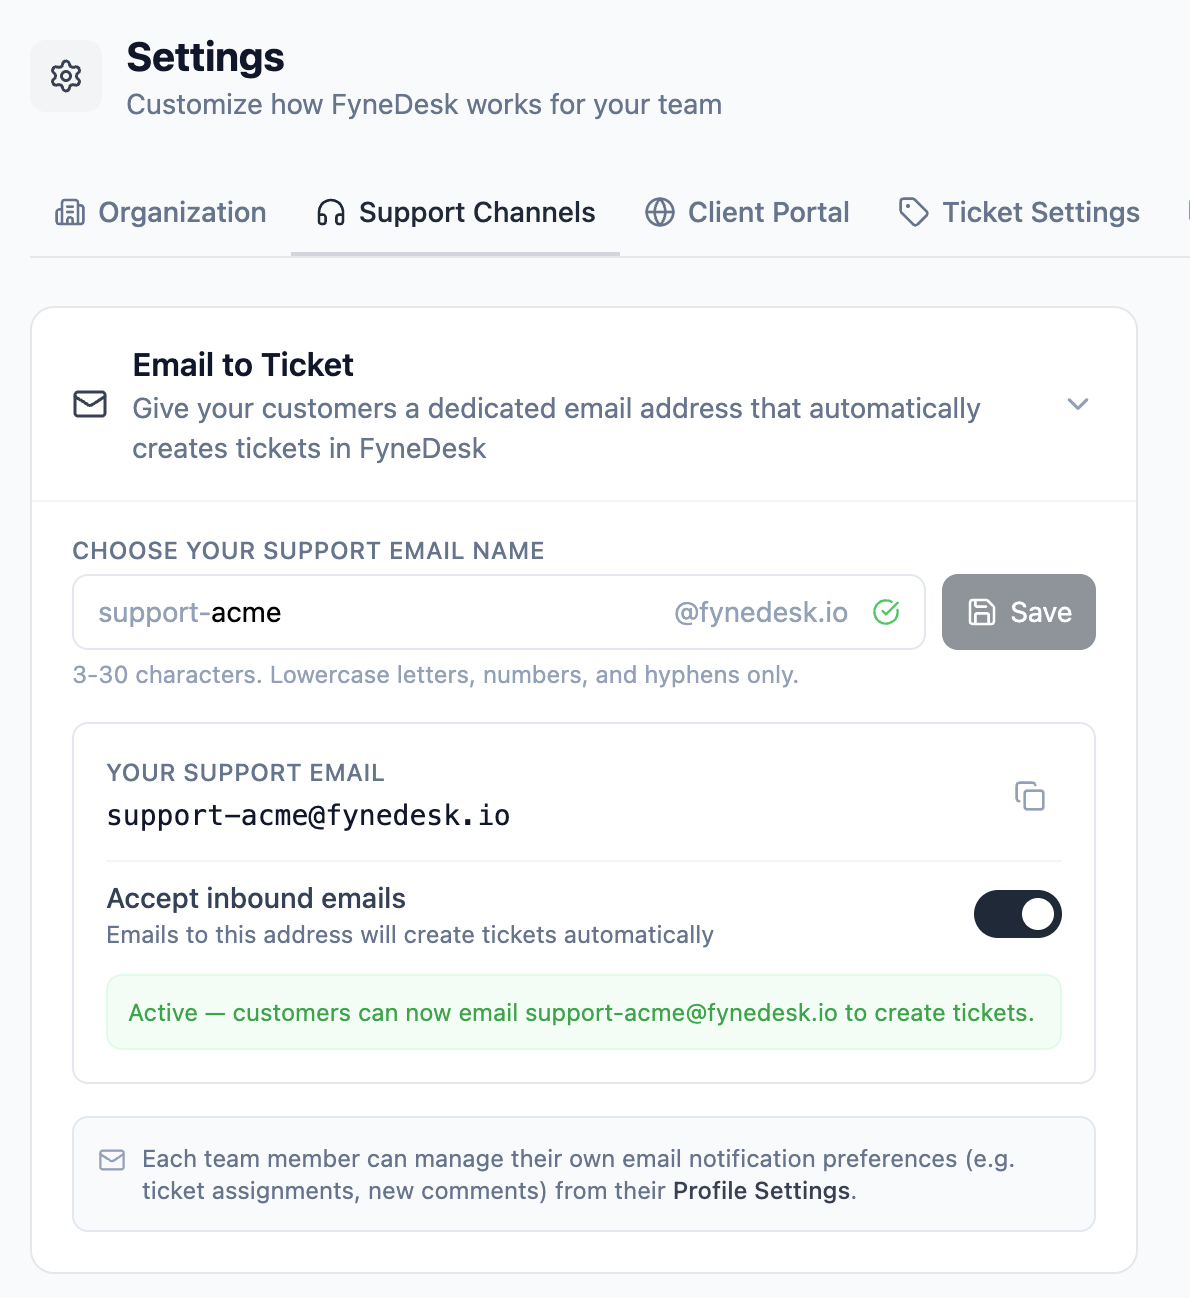
- 1 Type a short identifier for your organization in the email name field. For example,
acmegives yousupport-acme@fynedesk.io. Use lowercase letters, numbers, and hyphens only (3-30 characters). - 2 As you type, FyneDesk checks in real time whether the name is available. A green checkmark means it's free.
- 3 Click Save to reserve the address for your organization.
- 4 Once saved, flip the Accept inbound emails toggle on. Your address is now live — emails sent to it will create tickets.
support-acme or help-acme is better than anything cryptic.
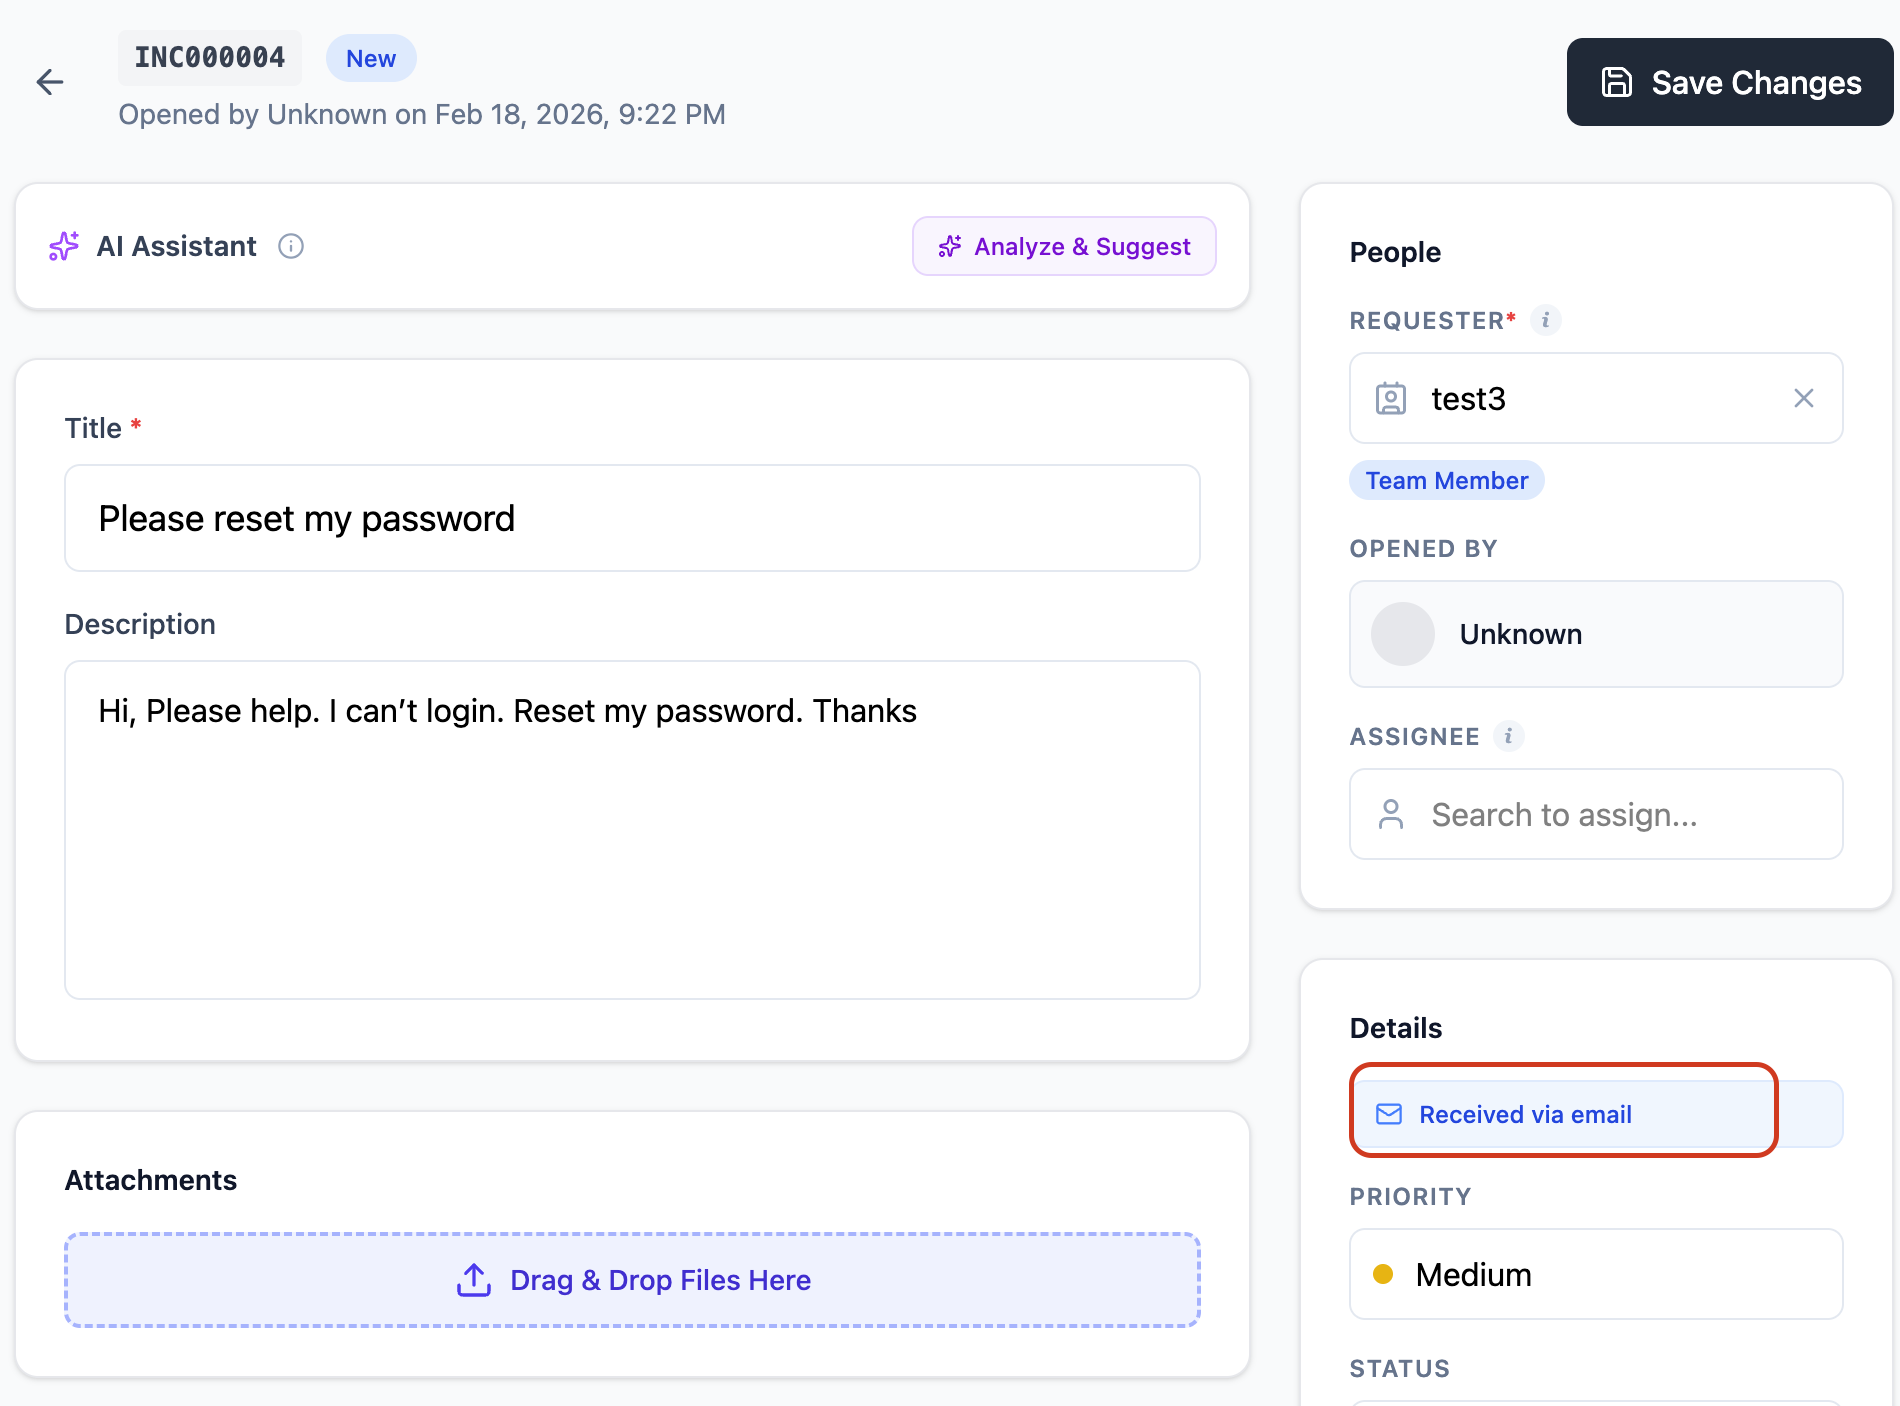
What a ticket from email looks like
When FyneDesk processes an inbound email, it creates a ticket with:
- The email subject as the ticket title
- The email body as the ticket description
- The sender's name and email captured as the requester
- The ticket source marked as "Email" so you can filter by it
Sharing your support email with customers
Once enabled, share the address wherever your customers might need to reach you:
- Your website's contact or support page
- Email signatures for your team
- Invoices, receipts, or any customer-facing documents
- Auto-reply messages on your existing email accounts
Enabling and disabling
You can toggle inbound email on and off at any time from Settings → Support Channels without losing your address. When disabled, emails sent to your address will not create tickets. Re-enable it whenever you're ready.
Individual notification preferences
Each team member controls their own email notification preferences separately. For example, an agent can choose to receive an email when a ticket is assigned to them, or when a customer adds a comment. These are personal settings managed from each user's profile — not from this settings page.
See the Profile Settings guide for details on notification preferences.
Frequently asked questions
How quickly do emails become tickets?
FyneDesk polls for new emails every 2 minutes. Most emails become tickets within a couple of minutes of being sent.
What happens to email threads and replies?
Currently, each email creates a new ticket. Threaded reply handling (where a reply to a ticket notification gets added as a comment) is on the roadmap.
Can I have more than one support email address?
Each organization gets one dedicated support email address. Multiple addresses per org are on the roadmap.
What if I already have a support@mycompany.com address?
You can use your own domain's email address with FyneDesk. See the Using your own email address section above for full instructions.
Are attachments in emails supported?
Attachment handling for inbound emails is on the roadmap. Currently, the email body is captured as the ticket description.
Using your own email address (Custom Email)
If your organization already has a support email on your own domain (e.g. support@yourcompany.com), you can connect it to FyneDesk so that emails your customers send to that address automatically become tickets — and replies you send from FyneDesk go out from your own address, not FyneDesk's.
How it works
There are two parts: outbound (replies sent from FyneDesk appear to come from your domain) and inbound (emails arriving at your address create tickets in FyneDesk). Both need to be configured for the full experience.
Step 1: Register your custom email in FyneDesk
- 1 Go to Settings → Email in FyneDesk.
- 2 Scroll down to the Custom Email Address section and expand it.
- 3 Enter the email address you want to use (e.g.
support@yourcompany.com) and click Add. - 4 The address will appear as Pending. Our team will activate it and send you DNS verification records, usually within 24 hours.
Step 2: Add DNS records to your domain
You will receive an email from our email delivery provider (Resend) with DNS records to add to your domain. This proves to email providers that FyneDesk is authorized to send emails on behalf of your domain.
- 1 Log in to your domain's DNS management panel (e.g. Cloudflare, GoDaddy, Namecheap, or wherever you manage your domain).
- 2 Add each DNS record exactly as shown in the Resend email. These are typically TXT and CNAME records.
- 3 Wait for DNS propagation. This usually takes a few minutes but can take up to 48 hours.
Step 3: Choose your FyneDesk support email name
While you wait for DNS verification, set up the inbound side. In Settings → Email, under Email to Ticket:
- 1 Choose a name for your FyneDesk support email (e.g. type
acmeto getsupport-acme@fynedesk.io). - 2 Click Save, then enable the Accept inbound emails toggle.
Step 4: Set up email forwarding
The final step is to forward incoming emails from your custom address to your FyneDesk support email. This is how inbound emails reach FyneDesk and become tickets.
- 1 Go to your email provider's settings (wherever your custom email mailbox is hosted).
- 2 Set up a forwarding rule to send a copy of all incoming emails to the FyneDesk address you chose in Step 3 (e.g.
support-acme@fynedesk.io).
Once forwarding is active, every email your customers send to your address will create a ticket in FyneDesk, and replies will go out from your own domain.
Step 5: Let us know
After completing the DNS records and forwarding setup, reply to the email from our team or contact us at support@fynedesk.io so we can finalize the verification on our end.